
Hi guys!
Today I'm showing the differences between an authentic Holy Lantern by Angelic Pretty and a replica version by Oojia.
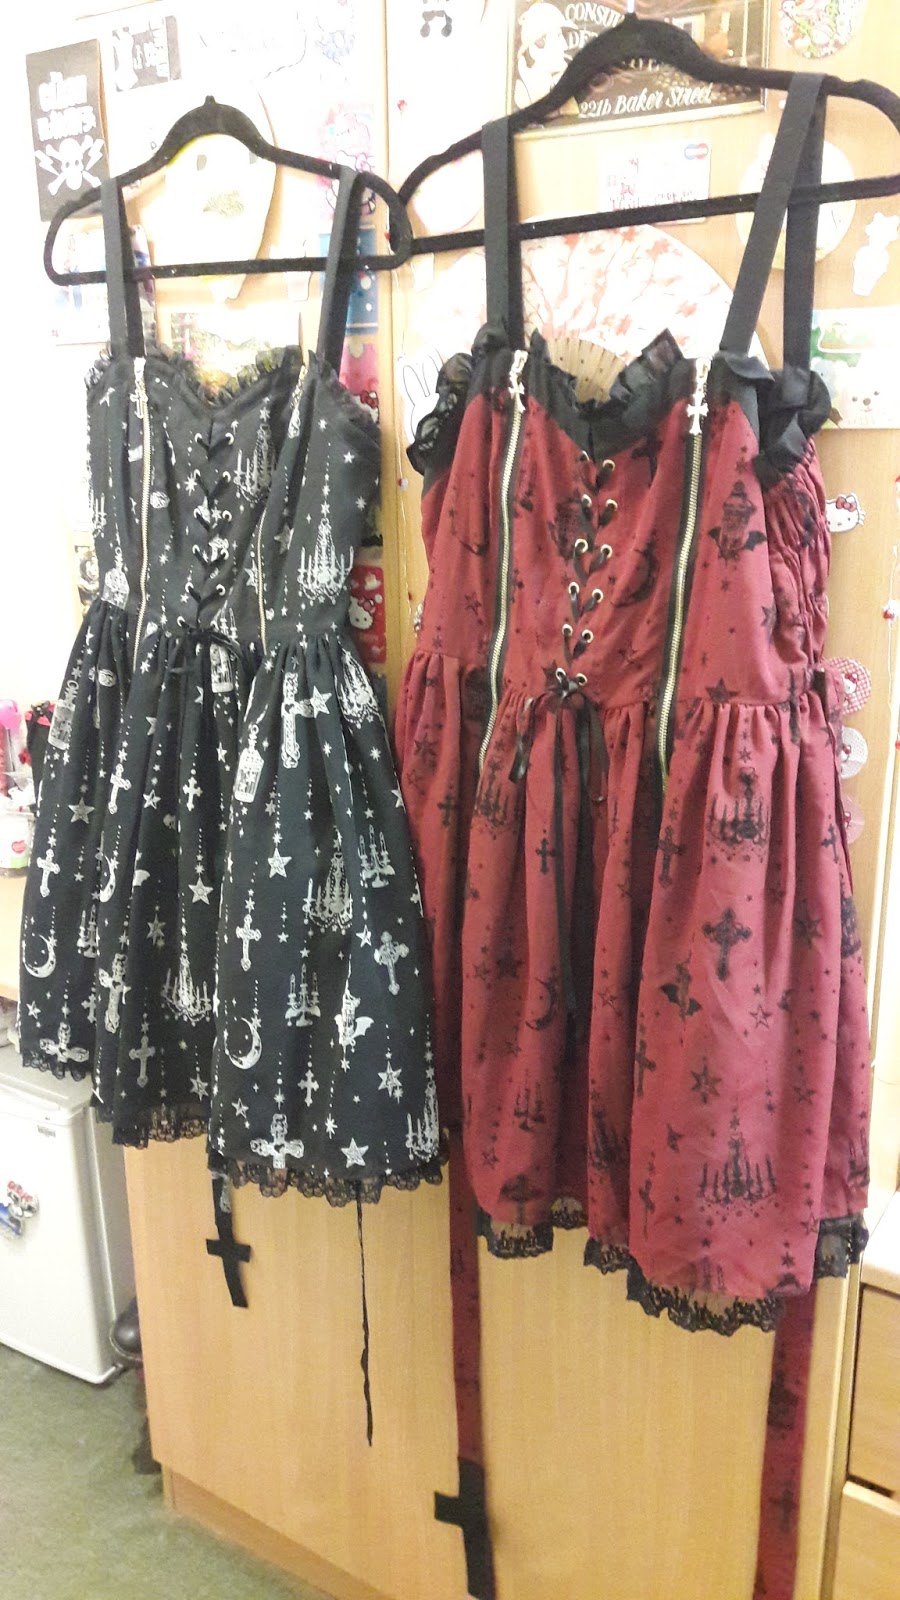
I bought the authentic Holy Lantern in the zipper-jsk style in black, and the replica zipper-jsk in red~
The Holy Lantern print features chandeliers, stars, moons, crosses and of course, lanterns. The print is 'flocked' or in other words, slightly fuzzy.
The Holy Lantern print features chandeliers, stars, moons, crosses and of course, lanterns. The print is 'flocked' or in other words, slightly fuzzy.
Real Holy Lantern~
I bought the authentic version for £210 from a reseller, New With Tags. It also came with a piece of sample fabric? I don't really understand why, but oh well.
Replica Holy Lantern~
The replica cost me $97 (£67) which was second hand, but only tried on. Luckily the seller marked down the package so I didn't get hit with customs.
Images for comparison~


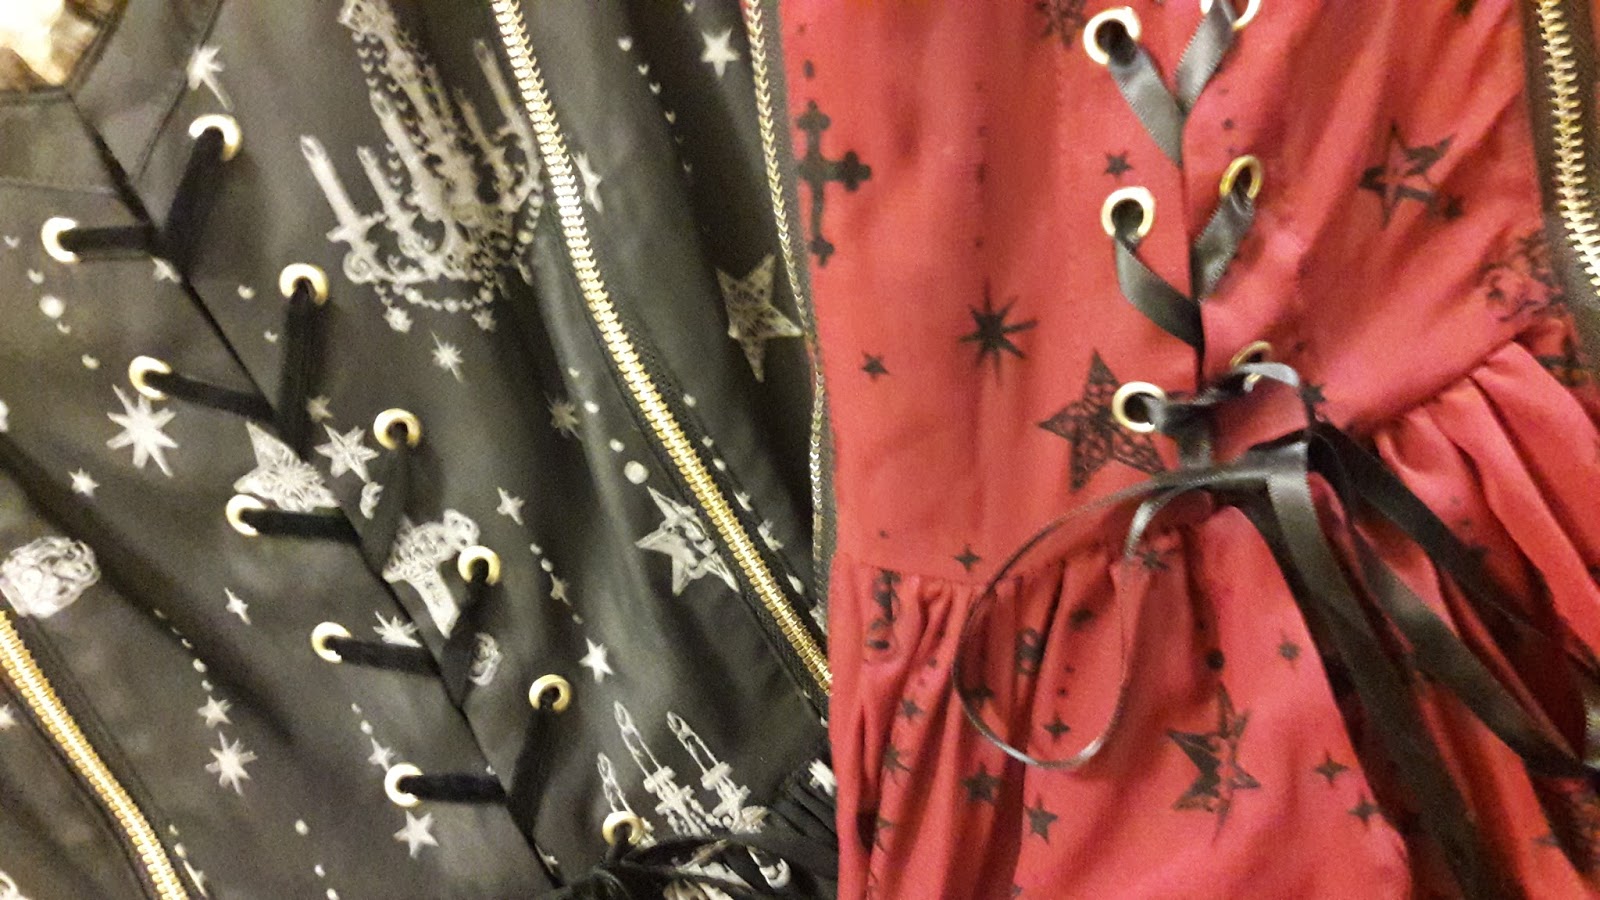


Sorry not all the images are super clear! The picture were taken on my phone.
Comparison~
1. The authentic dress overall has a more structured shape, it has a small built-in petticoat which helps hold out the skirt a little and show the waist. This doesn't make a huge difference when either dress is worn with a proper petticoat but is a nice addition to make the dress a little fluffier.
2. The zipper crosses. The authentic version features thinner hollow crosses as a pull where as the replica uses solid, chunkier crosses. Whilst the hollow crosses are perhaps a little more elegant, the replica crosses aren't terribly tacky or anything and are perfectly acceptable.
3. The neckline ruffle. The fabrics used are different; on the authentic, the fabric is more sheer and has more structure to it so that it stands itself up a little whereas the replica uses material that feels similar to the dress and is therefore a little more 'floppy'.
4. The actual print. It seems that on the replica, the entire print is smaller than it is on the authentic. There are also some very minor differences with some of the designs in the print, in that it just looks like someone hasn't quite copied the design with precision but it's not something you would recognise unless comparing the dresses directly
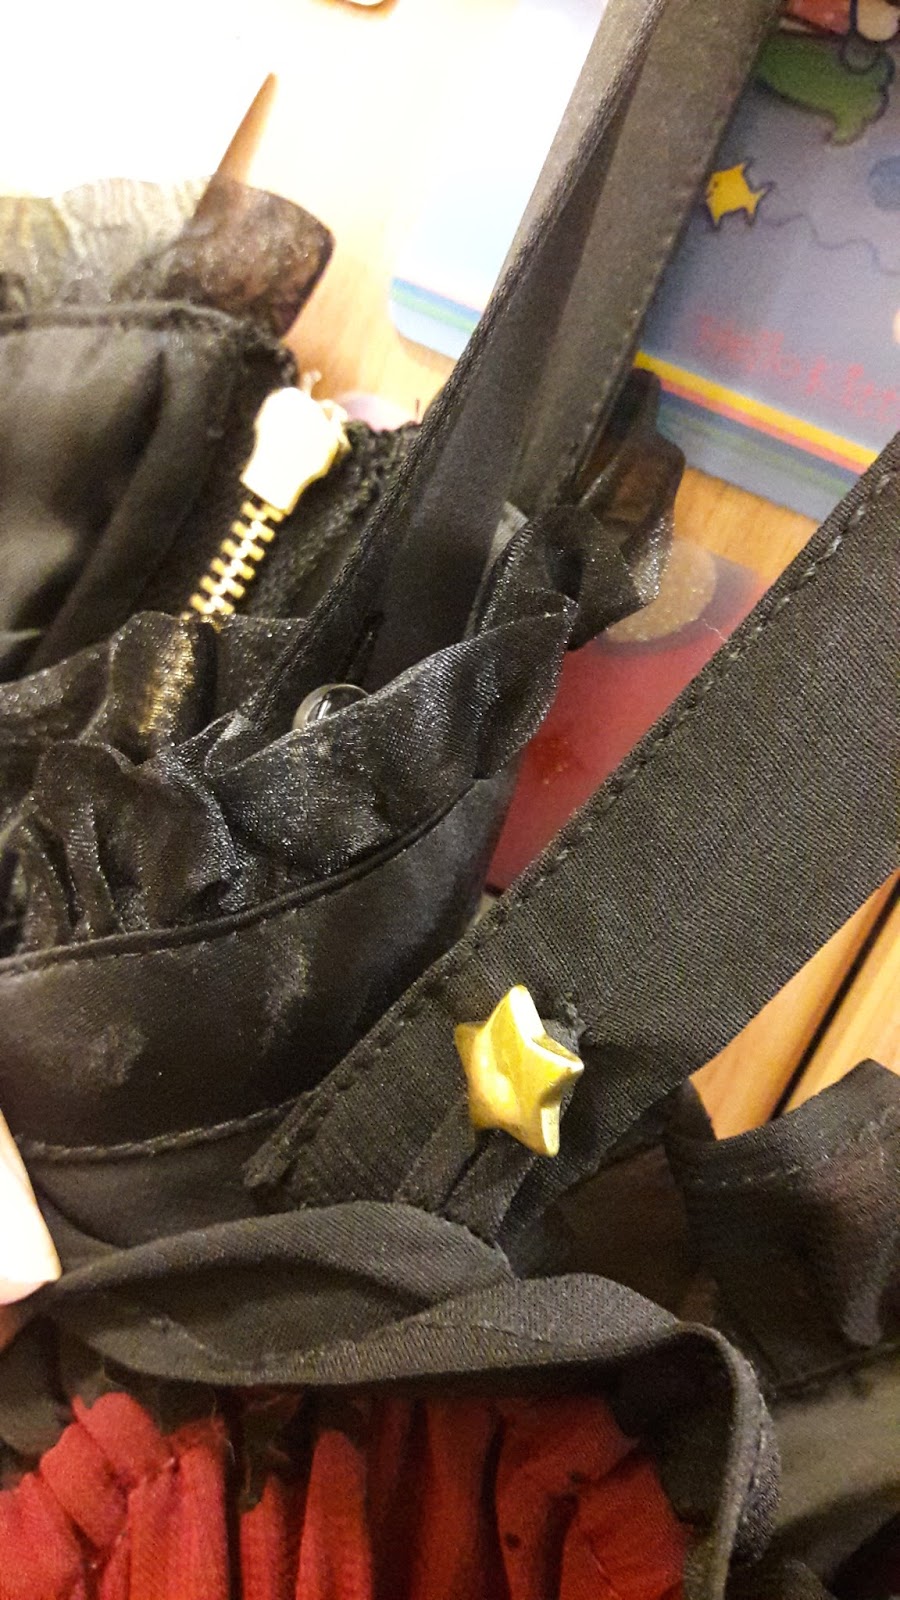
5. The straps. The replica actually has nicer star buttons use to attach the straps where as the authentic version just uses a regular clear button. The authentic versions has another hole on the strap to allow change in the length where as the replica only has one hole. (that said, I feel like i'm constantly pulling the straps back onto my shoulder with both dresses, is it just my shoulders being awkward??)
6. Ribbon lacing. Only a minor difference here, but the ribbon in the front lacing on the authentic version is somewhat velvety/flocked. personally I don't like it much and will probably change it out for another ribbon, but we'll see. The replica uses regular satin ribbon. Both ribbons are quite long even when tied, the authentic reaching to around half way down the skirt portion and the replica being even longer.
7. Waist ties. The main difference here is the length, and width. The authentic version has slim waist ties where as the replica has these BIG ASS chunky ones that are super long. Honestly, that's probably one of the things that bothered me the most about the replica when comparing them. What is the need for the waist ties to be so big?? T-T To be honest though, when tied up it doesn't look too hugely out of proportion with the dress. The smaller difference is just the button that attaches the tie to the dress. Th authentic dress has buttons that are pointed and the replica uses the same star buttons as the ones on the straps.
8. The lacing. The lace on the bottom of the authentic as the AP logo with chandeliers in between where as the replica has the AP logo with stars instead of the chandeliers. This is probably so that the lace can be used on other replica dresses rather than one specific design to save costs. It's not something you'd really notice unless looking at it specifically and again, doesn't look bad or out of place.
-
I think I've covered the differences between the replica and authentic, but I may have missed some!
I'm in no way saying that the replica is bad quality at all, in fact I think it's still one of the nicer dresses I have, and if I did not have the authentic version to compare it with I wouldn't have seen many differences. I think it's a very well-made replica and a lovely alternative if you just can't afford to pay brand prices, or if the sizing doesn't fit you.
~Thanks for reading, and I hope this post is informative~